Apple included the Translate app in iOS 14, which aims to make it easy to communicate with others in a foreign language. Here's how to get up and running with the new app.
Translation apps have been a staple of iOS for many years, with Google arguably offering one of the most popular versions on the planet. While users could ask Siri for translations previously, it couldn't really compete against an app dedicated to translations, especially for live conversations.
During WWDC, Apple confirmed it was bringing the Translate app out in iOS 14, a tool meant to provide more conventional translation functionality. With it, anyone can hold a conversation with someone in a completely different language, and to more easily hold their own while traveling abroad.
At this time, the Translate app works with these languages:
- Arabic
- Chinese (China mainland)
- English (US)
- French (France)
- German (Germany)
- Italian (Italy)
- Japanese
- Korean
- Portuguese (Brazil)
- Russian
- Spanish (Spain)
The list currently doesn't include variations of a common language, such as British English or other regional derivations. More variants and languages are expected in the future.

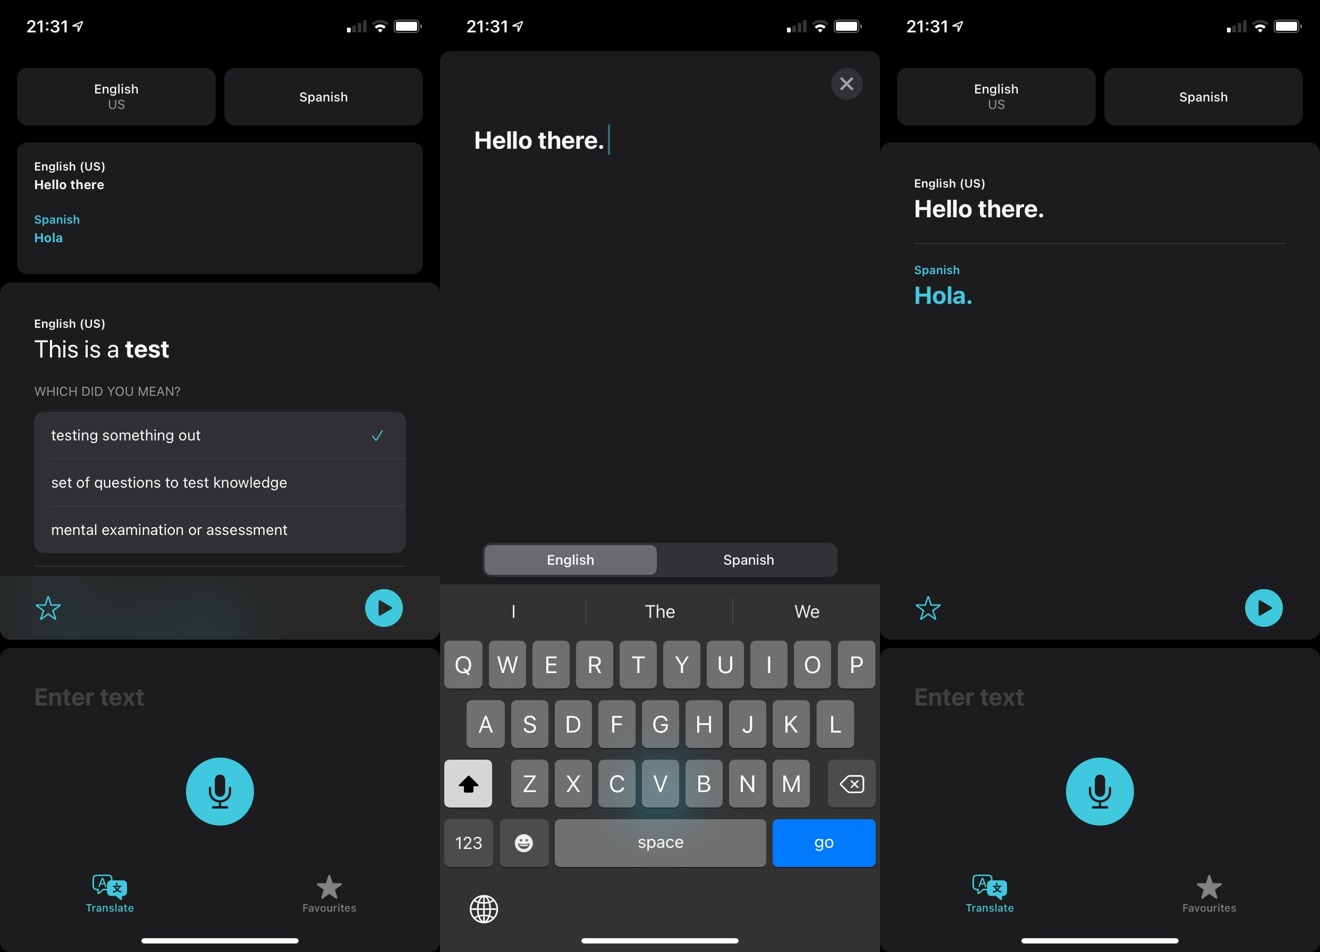
Going through a simple translation in the iOS 14 Translate app.
How to translate speech with Translate for iOS 14
- Launch the app.
- Ensure the two languages at the top are appropriate for the conversation.
- Press the microphone button and start speaking.
- Pause after finishing the statement, and a translation will be spoken aloud, as well as displayed on the screen.
If the conversation will only be verbal, use the iPhone in landscape orientation. This will rearrange the layout and give more space on the screen for translations to appear.
How to translate text with Translate for iOS 14
- Launch the app.
- Ensure the two languages at the top are appropriate for the conversation.
- Tap the section marked Enter Text.
- Select the language that will be typed into the iPhone. The appropriate keyboard will be displayed.
- Start typing. Once completed, tap Go.
- A translation will be displayed on the screen.
How to change languages in Translate for iOS 14
- Select either of the two language titles at the top of the app. Generally the left will be for your language, while the right covers the translation.
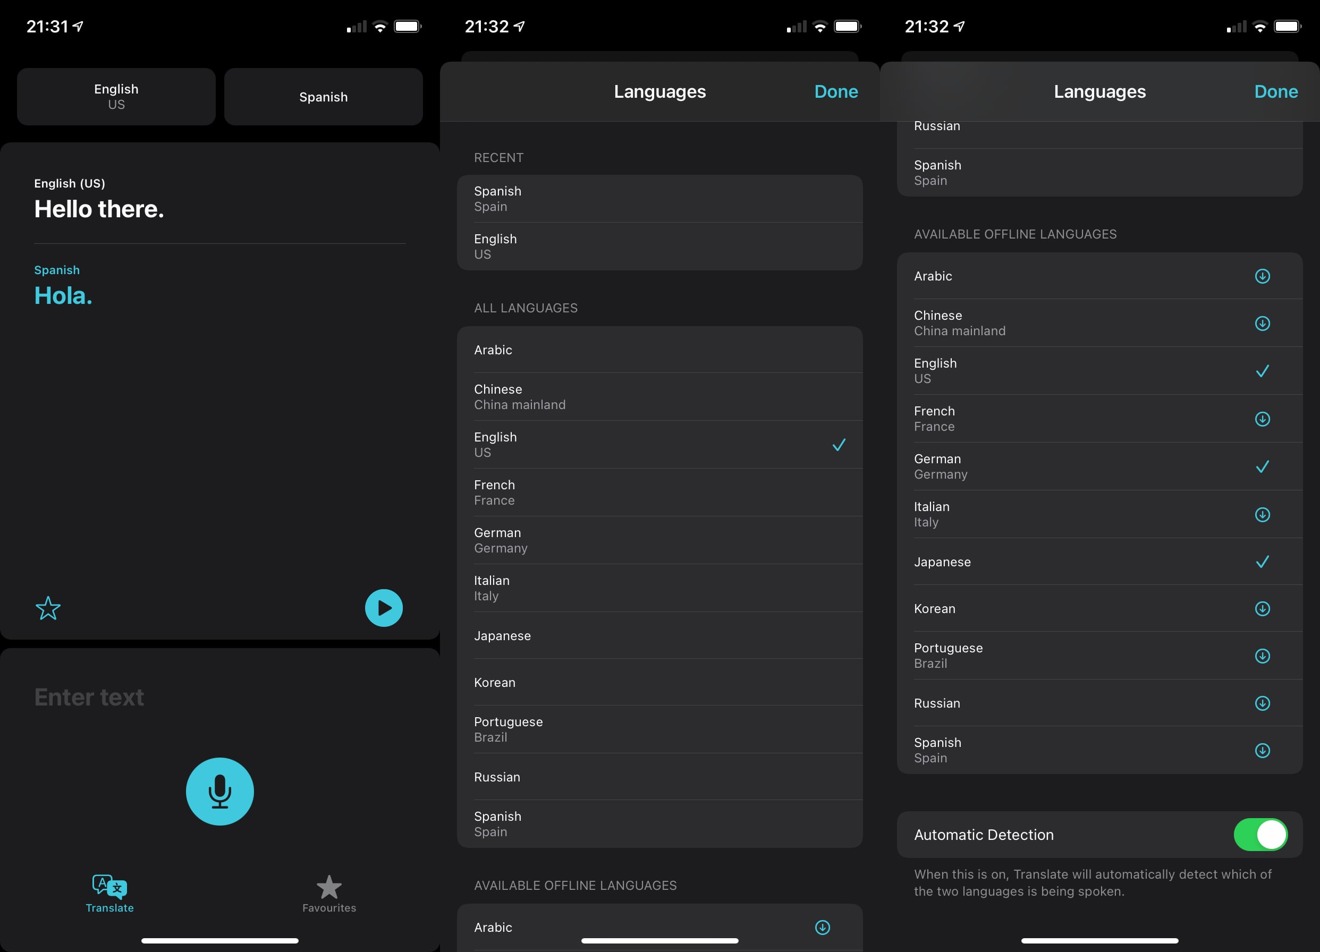
- Scroll down the list to select the required language under "All Languages."
- If you have used it before, the language will appear under "Recent" at the top.
- Select Done.

Changing the language and downloading files for offline translations in iOS 14.
How to use languages offline in Translate for iOS 14
- To download the language, select either of the two language titles at the top of the app.
- Scroll down to "Available Offline Languages"
- Tap the download link next to the language.
- Select Done.
How to enable and disable Automatic Detection in Translate for iOS 14
- Select either of the two language titles at the top of the app.
- Scroll to the bottom and tap the Automatic Detection toggle.
- Select Done.
Generally speaking, it is worth keeping Automatic Detection active, as it will automatically determine which language of the two selected versions is being spoken, and will translate accordingly.
How to use the Attention Mode in Translate for iOS 14
- Perform a translation.
- Rotate the iPhone to landscape orientation.
- Tap the double-arrow Enlarge button.

Landscape usage is better for conversations, and includes the Attention Mode.
The Attention Mode displays a translation in a larger font, taking up the entire display of the iPhone. This is useful in some situations, such as if the person is far away and cannot hear the vocal translation.
Favorites
Users can save a translation that they may use repeatedly in the future as a Favorite. For example, phrases like "Where is the toilet?" and "Where is the library?"

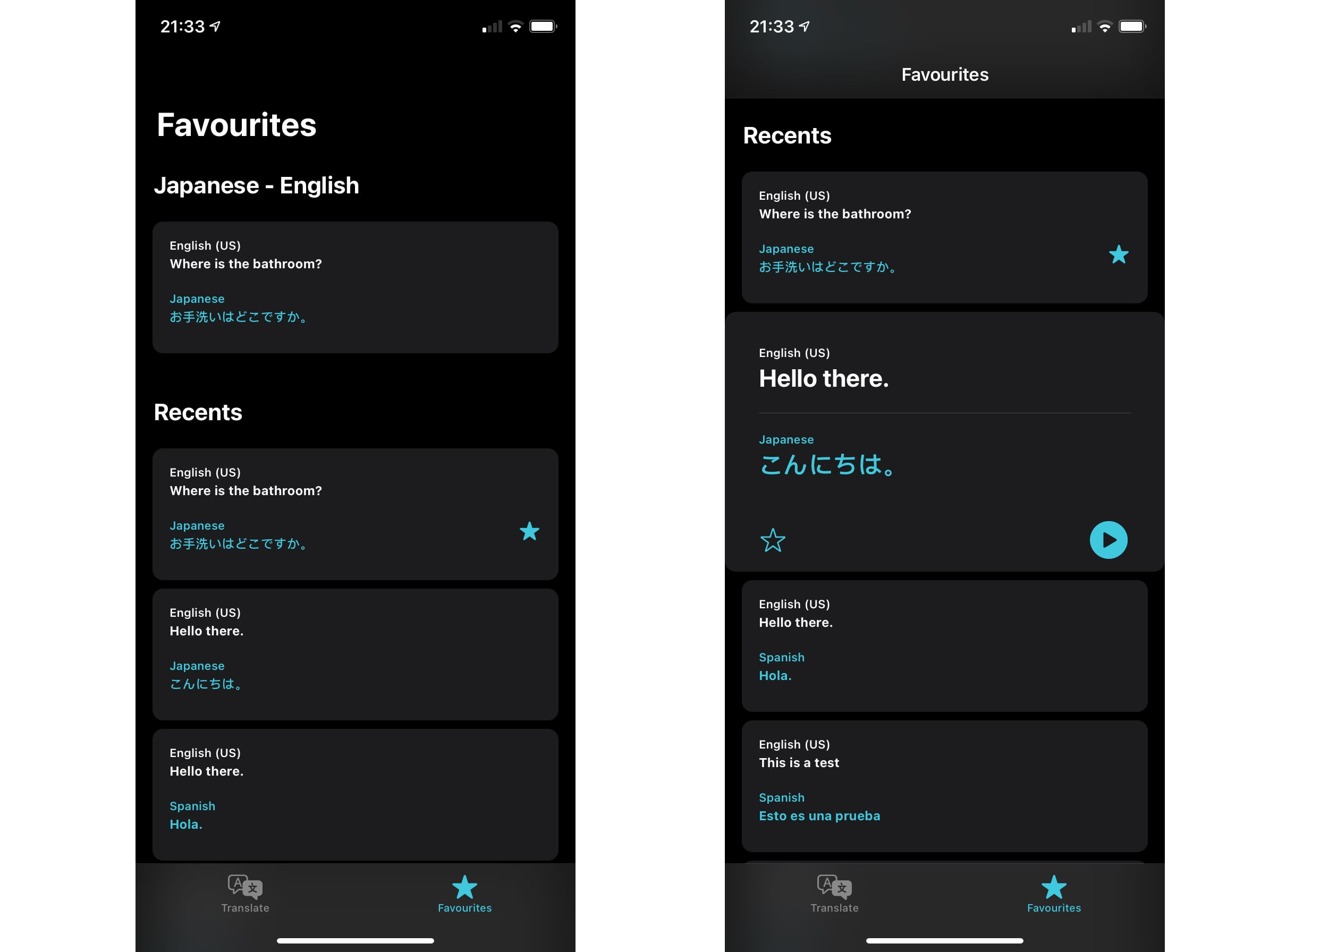
Translate's Favorites tab shows recent and saved translations.
Phrases can be tagged as a favorite by tapping the star next to the translation. Saved phrases appear under the Favorites tab.
The Favorites tab includes all tagged phrases at the top of the list, before including a list of recently-produced translations. Tap a translation to gain access to the play button for an audio version, and the star to enable or disable the Favorite tag.
September 21, 2020 at 04:45AM
https://ift.tt/32N6RVf
How to use the Translate app in iOS 14 - AppleInsider
https://ift.tt/2ZaIe2Q
iOS
:no_upscale()/cdn.vox-cdn.com/uploads/chorus_asset/file/22686894/backboneonexbox.jpg)
No comments:
Post a Comment